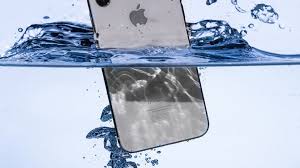
Water damage is one of the most common and frustrating problems iPhone users encounter. Despite Apple’s advancements in making iPhones more water-resistant accidents still happen. Whether it’s a dip in the pool, a spill of coffee or an unexpected rainstorm, water damage can wreak havoc on your device. This comprehensive guide will walk you through the steps to repair water damage in your iPhone offering both immediate actions and long-term solutions.
Understanding Water Resistance in iPhones
Before diving into repair techniques it’s essential to understand the water resistance levels in different iPhone models. Apple has been progressively improving this feature:
- iPhone 7 and 7 Plus: IP67 rating meaning they can withstand splashes and brief submersion in water up to 1 meter for 30 minutes.
- iPhone 8 and newer models (excluding SE): IP67 to IP68 ratings with some models tolerating submersion in water up to 2 meters for 30 minutes.
However water resistance does not mean waterproof. Over time wear and tear can reduce the effectiveness of water-resistant seals.
Immediate Steps After Water Exposure
If your iPhone gets wet quick action can minimize the damage. Here’s what you should do immediately:
- Turn Off the iPhone: Power off your device immediately to prevent electrical shorts.
- Remove Accessories: Take off any cases or covers to allow the phone to breathe and dry out more effectively.
- Dry the Exterior: Use a soft lint-free cloth to gently dry the outside of your iPhone.
- Remove the SIM Card: This helps in drying the internal components and prevents further damage.
- Avoid Heat Sources: Do not use a hairdryer microwave or oven to dry your iPhone. Excessive heat can damage internal components.
The Rice Method: Myth or Reality?
Many people suggest placing your wet iPhone in a bag of rice. While this method can sometimes help, it’s not foolproof. Rice can absorb some moisture but often fails to reach the internal components effectively. Additionally rice grains or dust can get into the phone potentially causing more harm.
Better Alternatives for Drying
- Silica Gel Packets: These are more effective than rice. Place your iPhone in a sealed container with several silica gel packets and leave it for 24-48 hours.
- Vacuum Sealed Bag: Placing your iPhone in a vacuum-sealed bag can help draw out moisture more effectively.
- Desiccant Packs: Specialized desiccant packs designed for electronics can also do a better job than rice.
Assessing the Damage
After allowing sufficient drying time power on your iPhone to check its functionality. Test the following:
- Screen and Touch Sensitivity: Ensure there are no watermarks or reduced sensitivity.
- Buttons and Speakers: Test all buttons and the speakers for any muffled sound or unresponsiveness.
- Battery Life: Monitor if the battery drains faster than usual which could indicate internal damage.
Professional Repair Options
If your iPhone is still malfunctioning, consider professional repair services. Here are your options:
- Apple Service Center: The safest option is to take your iPhone to an Apple service center. They have the tools and expertise to deal with water damage although it might be costly if out of warranty.
- Authorized Repair Shops: Many third-party repair shops are authorized by Apple and can offer reliable services at a potentially lower cost.
- DIY Kits: For those comfortable with taking their iPhone apart DIY repair kits are available. However this requires a certain level of skill and knowledge.
DIY Repair: Step-by-Step Guide
If you opt for a DIY repair follow these steps carefully:
- Gather Tools: You’ll need a pentalobe screwdriver, a suction cup plastic opening tools and a heat source (like a hairdryer set to low).
- Open the iPhone: Remove the screws near the charging port and gently lift the screen using the suction cup and plastic tools.
- Disconnect the Battery: Carefully disconnect the battery to prevent any short circuits.
- Inspect for Water Damage: Look for watermarks or corrosion on the internal components.
- Clean the Components: Use isopropyl alcohol and a soft brush to clean any corrosion or residue.
- Dry the Internal Components: Use a desiccant pack or let it air dry completely before reassembling.
Preventing Future Water Damage
Prevention is better than cure. Here are some tips to protect your iPhone from future water damage:
- Waterproof Cases: Invest in a high-quality waterproof case especially if you frequently use your phone near water.
- Avoid Exposure: Be mindful of your surroundings and avoid using your phone near pools, beaches or in the rain.
- Regular Checks: Periodically check the seals and covers for any wear and tear and replace them if necessary.
Understanding Apple’s Water Damage Policy
Apple’s warranty does not cover water damage. However AppleCare+ offers coverage for two incidents of accidental damage including water damage at a reduced service fee. Understanding the terms and conditions of your warranty or insurance can save you from unexpected repair costs.
Conclusion
Water damage in iPhones can be a daunting issue but with prompt action and the right approach you can often mitigate the damage. Whether you choose immediate drying techniques, professional repair at a service center or opt for a DIY fix, understanding the steps involved is crucial. Always aim for preventive measures to protect your iPhone from future incidents ensuring it remains functional and reliable for years to come. For more detailed guidance visit our site for comprehensive tips and solutions.